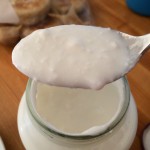
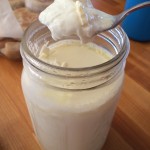
Yonah Shimmel perpetual yogurt starter
I read about the Yonah Schimmel perpetual yogurt start in Sandor Katz’s book “The Art of Fermentation” and have wanted to try it for some time. Finally my friend Jeff Stutz was in New York and brought me a jar of it in July 2015! It was surprisingly runny and grainy, but after making yogurt for some time at home, we knew that the preparation methods have a big impact on flavor and texture.
There’s two types of yogurt starters: the old ones and the new way. The old way to make yogurt is to take a little bit of the old batch of yogurt and add it to some milk, and let it ferment until it makes a new batch (the perpetual method). The new way uses specific strains of bacterial cultures (usually Lactobacillus delbrueckii subsp. bulgaricus and Streptococcus thermophilus) that have been selected for flavor and consistency to make practically every kind of yoghurt that you can get at the supermarket (except true Greek yoghurt).
To make yogurt thicker, you can strain out the whey as much as you want when you’re done. As an aside, it seems most “Greek” yogurt nowadays is just regular yogurt with additional thickeners!
Our goal for making yogurt is to make it EASY for us, and of course it needs to taste good. Buying cultures every so often isn’t that difficult, but they do cost about $8 for 5 packets of starter, so it’s not a trivial cost. Leaving the milk mixture in the food dehydrator overnight is easy, but our goal was not to have to do any further processing. We tried the “Greek” style of perpetual starter, but found that there was just too much whey in it for our tastes, so we’ve just been using a “traditional” yogurt starter for a year or so.
Shannon and I read about making yogurt in a variety of places, but the vendor site of our favorite “traditional” yogurt starter, Cultures for Health, gave us lots of information about how to make good yogurt. We found that scalding the milk to a temperature of 180F (slowly!) will reduce or eliminate the lumps, and a longer, lower temperature ferment will produce a thicker yogurt, and more acidic. In our household, that means putting the yogurt in our food dehydrator at 105F overnight from about 9pm until 6am.
There is also a video of the Yonah Schimmel Knish Bakery where they show just a little of their secret yogurt making process: Put some of the yogurt in a bottle of milk and wait. Without scalding the milk first, they will have lots of lumps, but it will likely be much more acidic and perhaps more runny. The only think to do is try and experiment and see how it turns out. We used our normal method of heating the milk to 180F, and then cooling it to 115F and then pouring it in a 1 quart jar with 2 tablespoons of old yogurt. It turned out great, and doesn’t leak out too much whey for us- perhaps it’s the best one we’ve made so far. The flavor is VERY sweet/mild, so not that acidic using the process that we used.
If anyone in the San Francisco area wants some of this yoghurt to make their own perpetual yoghurt starter, feel free to contact me at scott at dylewski.com and maybe you can stop by to get some!


